


This article described how to protect your Hetzner Cloud workload with a KVM based VPS provider like Hetzner. This is not a sponsored article and hopefully helps people to easily protect their environment.
Step 1: Get your FortiGate KVM image
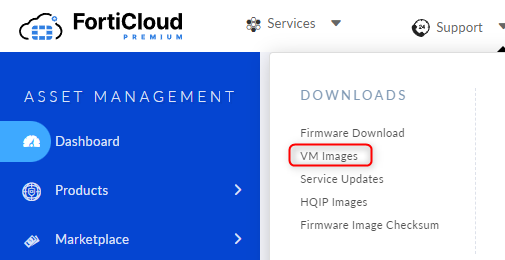
Since FortiGate images are not available as ISO files to install it on an empty disk, we need to solve it with another method. Go to support.fortinet.com, log in or create a free account. Now go to Support -> VM Images on the top menu.
Select “FortiGate” as Product and “KVM” as Platform. Download the KVM image for new deployments. Make sure to select the right type like VM64 for x86 based platforms and ARM64 for ARM based setups.

Step 2: Convert your image to a raw .img file
Download qemu to convert the image.
qemu-img.exe convert -f qcow2 -O raw fortios.qcow2 fortios.imgUpload the newly created image to a direct download file hoster or create a direct download link using Azure Blob storage for example or a local, internet accessible webserver.
Step 3: Setup VM instances
Create a network

Create VM
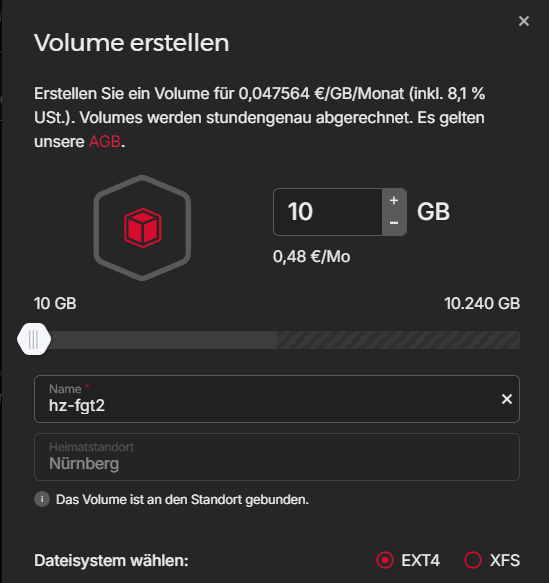
Create a server with any type of Linux. Add a Public IP to it. And also create a volume which you add to the server.
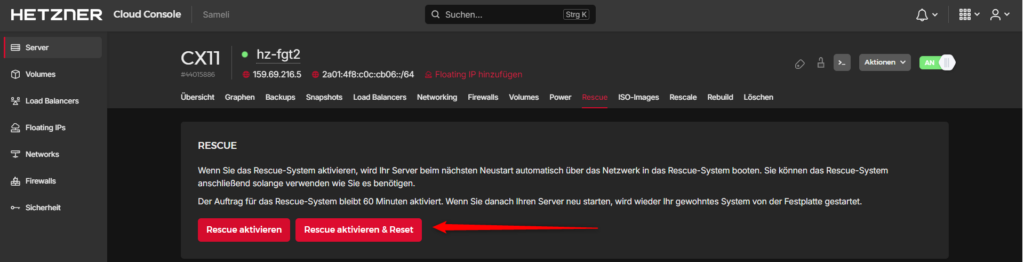
Go to the created server and select “Rescue”. Click on Rescue aktivieren & Reset.
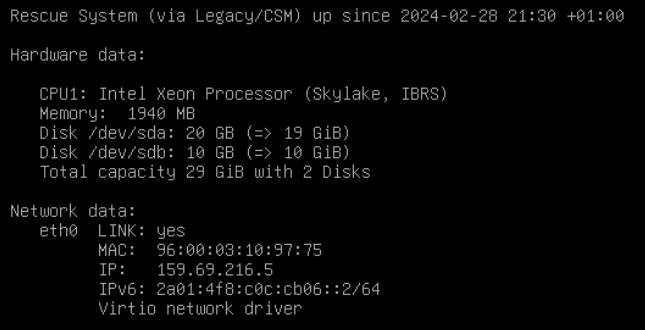
Access the VM through the console using the displayed login credentials.
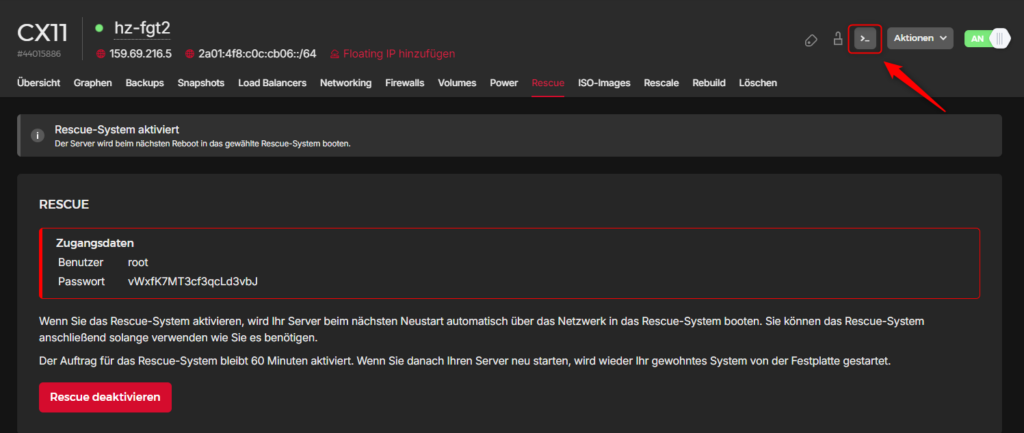
While you log in, IP and Disk information will be displayed.
Mound the additionally created volume /dev/sdb.
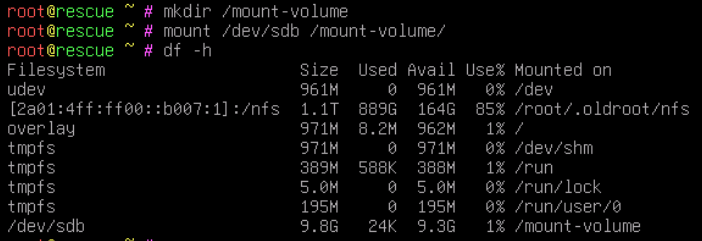
Download the previously created image from the webserver to the mounted filesystem.

Write image to boot disk
root@rescue /mount-volume # dd if=fortios.img of=/dev/sdaAfter completion, reboot the server and it should boot now from boot disk with FortiOS.

You can now keep the volume attached, as it will be used as log disk from FortiGate or you can detach and delete it.
Step 4: Network configuration
Enable private network access
Go to the server settings and attach the previously created network.
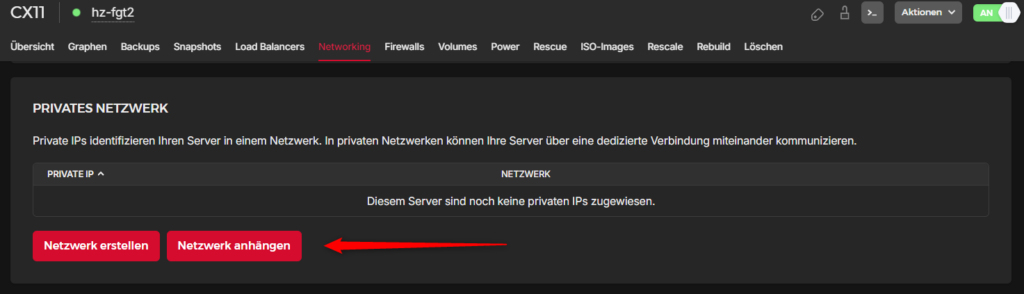
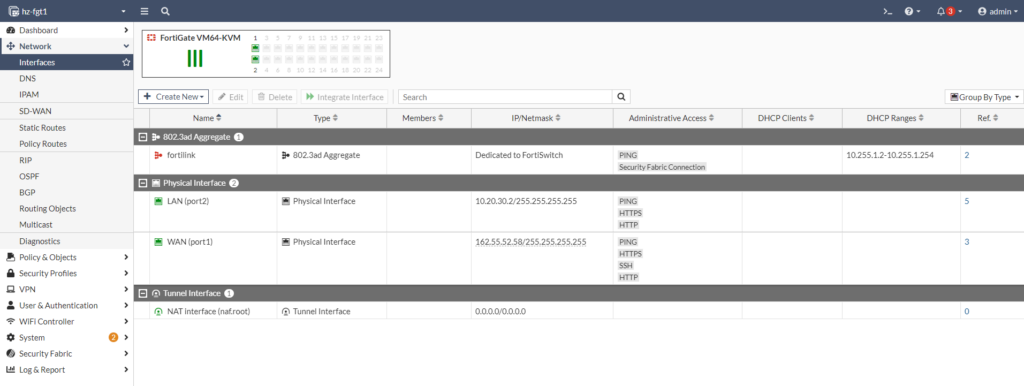
You will see then the assigned IP in this field. Now, on the FortiGate you will see a second Interface, which will be the private network.
Disable Default GW propagation
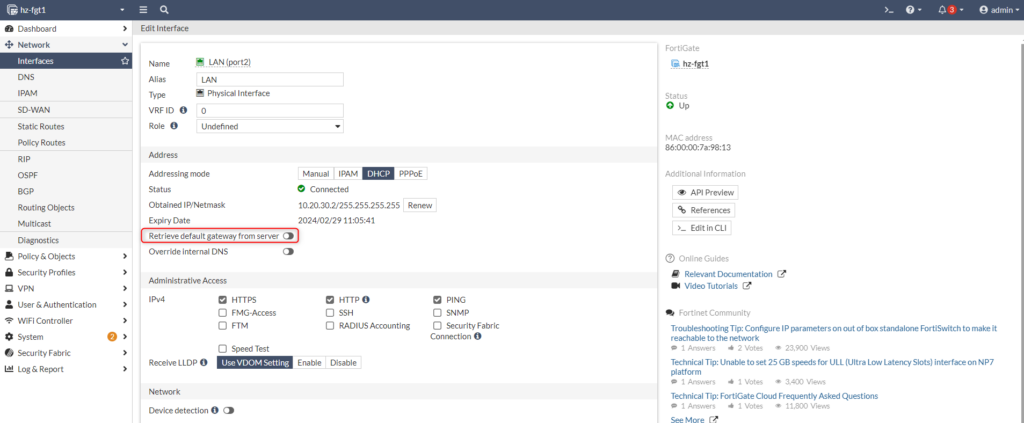
Make sure you configure the same IP as /32 or use DHCP assignment for port2. If you’re using DHCP, disable “Retrieve default gateway from server”.
Create a static route
As described in Hetzner’s Knowledge Base, create a static default route (even it is already retrieved via DHCP) towards 172.31.1.1.

Create a firewall rule
Create a Firewall Policy to enable outbound internet access for LAN devices

Create a route towards the FortiGate
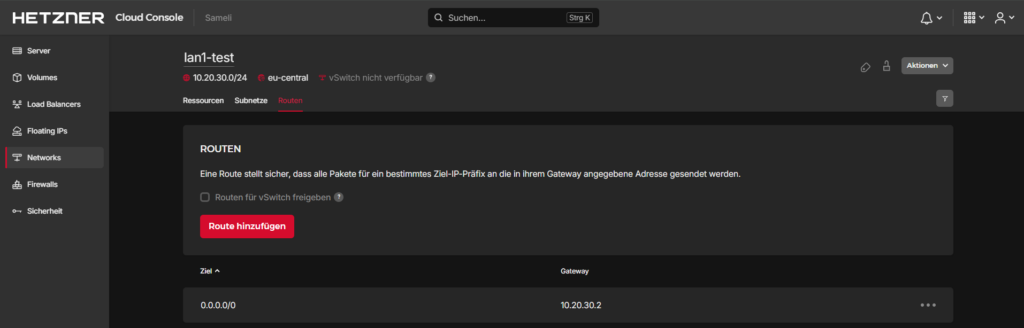
Go to networks -> [Previously created network] -> Routen and create a default route pointing towards the FortiGate
Step 5: Create a protected server
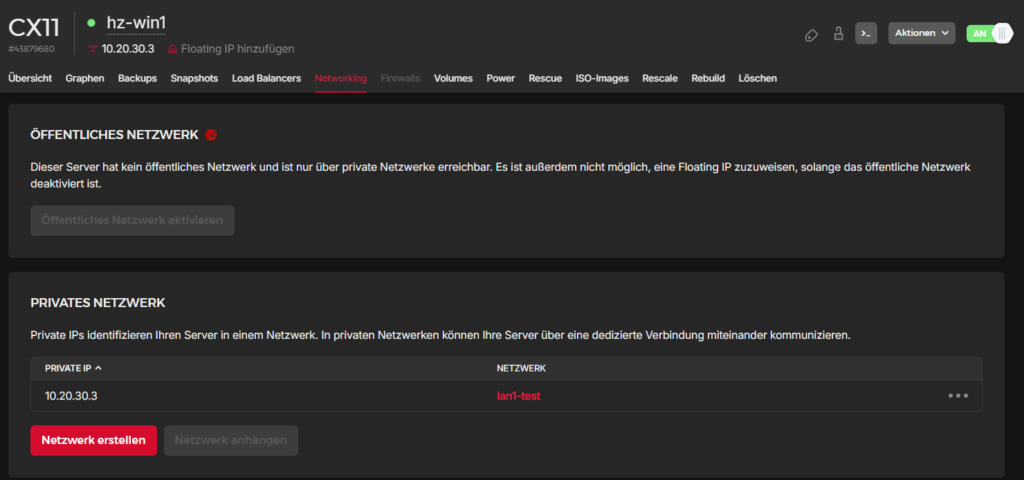
Create a second server and disable public network access. Attach the previously created private network.
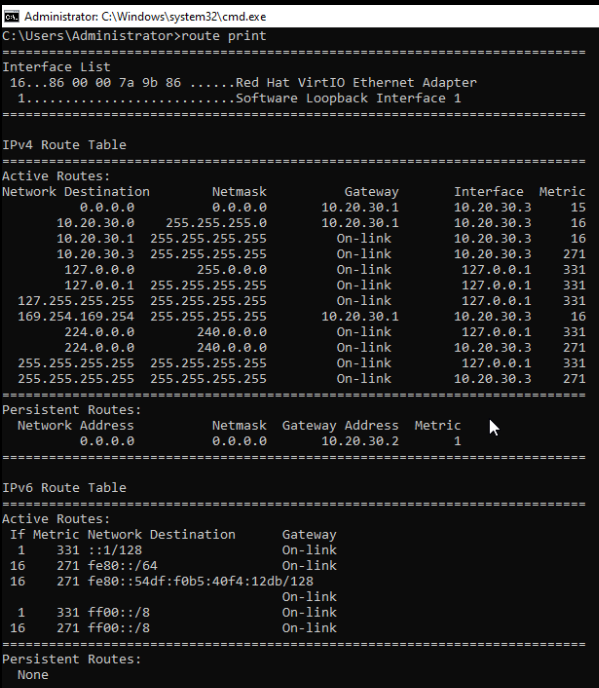
Log into the server and create a persistent route.

Review the host’s route table and verify the route.
Verify connectivity via internet.

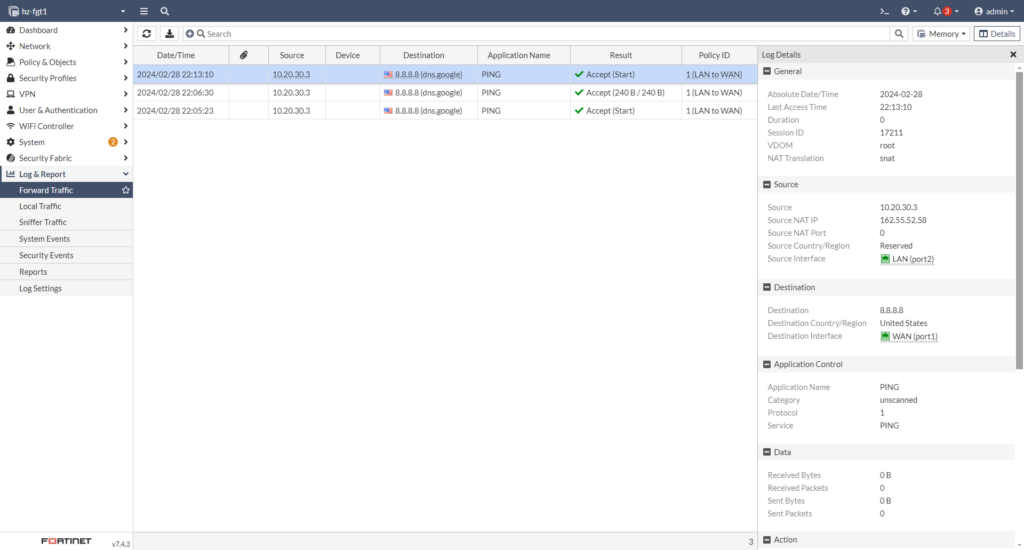
Verify if traffic is being filtered by FortiGate.
(optional) Step 6: Publish Service via VIP
Create a Virtual IP
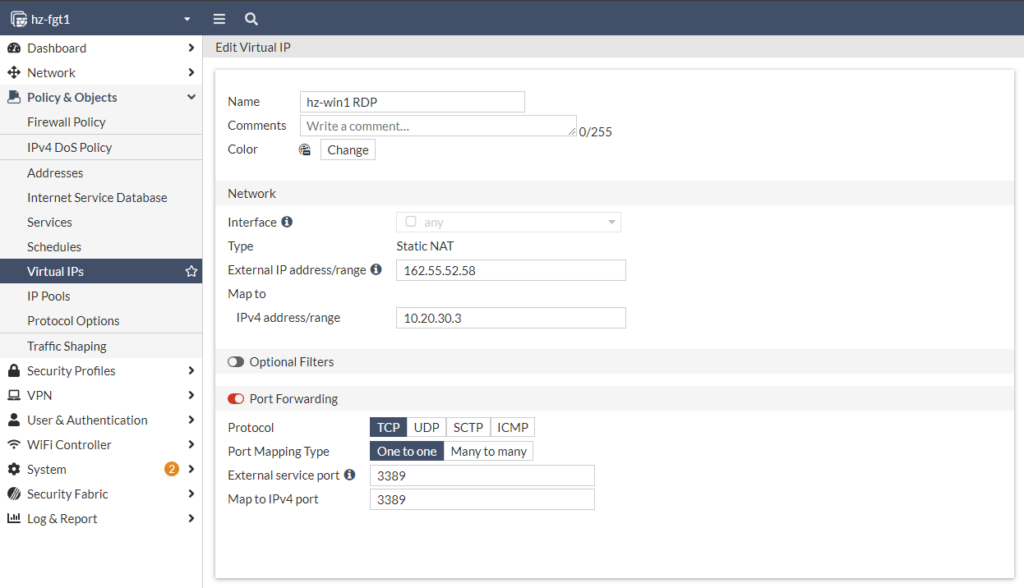
Add external IP from FortiGate and private IP to which traffic should be mapped to. Also specify the port which should be forwarded.
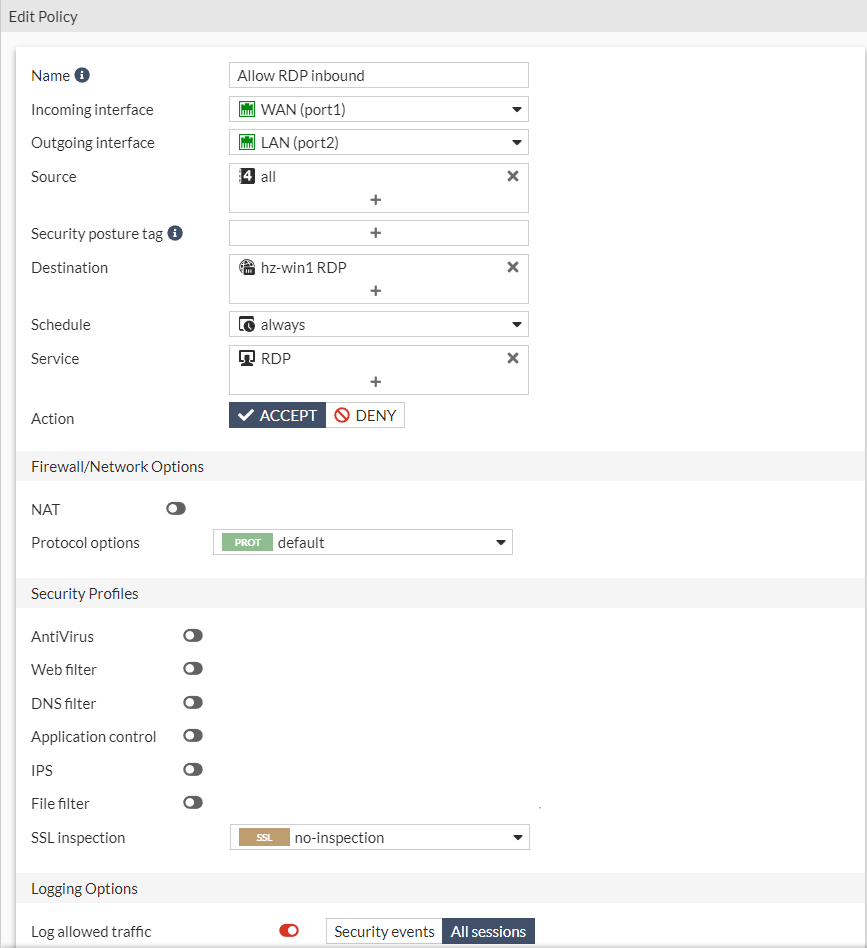
Create Firewall Rule
Create a firewall rule to the newly created VIP and select Security Profiles. As this is an example, this is not accurate. If you intent to protect a webserver, I suggest adding the certificate with private key to the FortiGate and enforce SSL inspection to this traffic.